
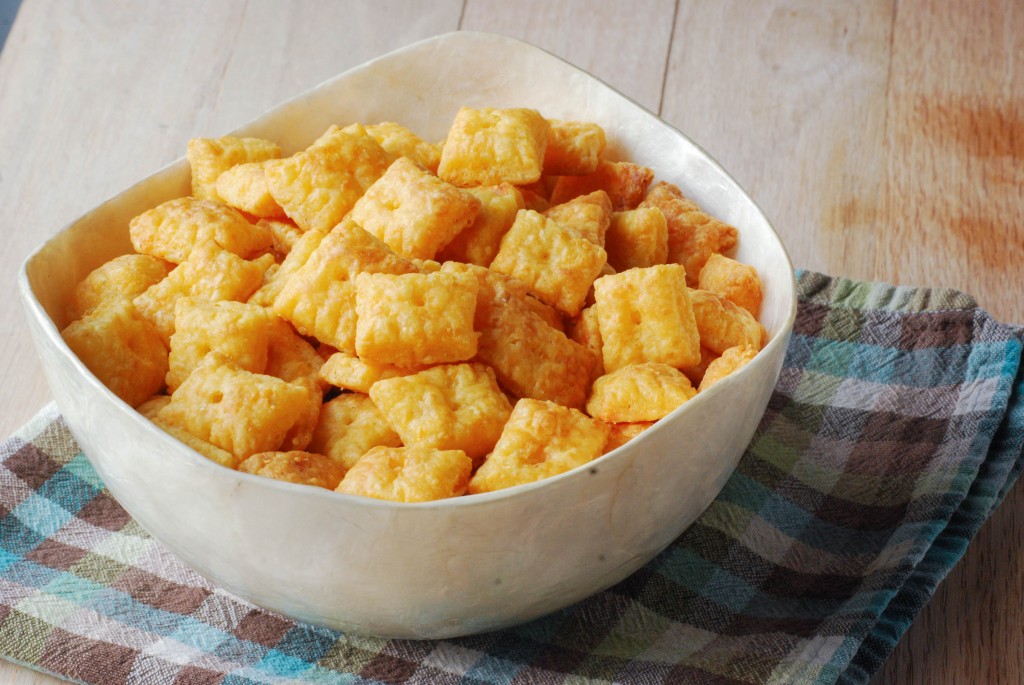
Finally a recipe!:) I mentioned on my Big Announcement post that I have been obsessed with cheez-its. I do get the reduced fat kind, but they still probably aren’t the best snack ever, so I thought I would try making them at home. These didn’t quite taste like the boxed cheez-its but they were really good. They were cheesy and flaky and crispy all at the same time. I think the cheesiness can even be amped up a bit next time by adding little more cheese. Plus, they use ingredients I always keep on hand. Mine did puff up quite a bit, but my dough got quite warm while we were rolling out and cutting it. So next time I will refrigerate for longer before baking. And yes I did say while “we” were rolling it out. Adam helped me tremendously by poking the holes in the middle and crimping the edges, though the design got a little lost in the baking process, which again I think will help to refrigerate longer. Even though mine weren’t as flat and crispy as the boxed crackers, they are still really good and somewhat addictive!
Homemade Cheez-Its
Source: Fearless Homemaker, orginally Katrina’s Kitchen
Ingredients:
6 oz. sharp cheddar cheese, grated
4 tbsp. unsalted butter, cold and cut into cubes
3/4 cup all purpose flour
1/4 tsp. salt, plus more for topping
2 tbsp. ice water
Directions:
In a medium sized bowl add the cheese, butter, flour and salt. Using a pastry cutter, cut the butter into the dough until mixture resembles coarse crumbs.*
Transfer mixture to a stand mixer. With the mixer on low, gradually add in the ice water. Mix until it forms a soft dough. If too dry you can add a tad more water, but don’t add too much as you don’t want a sticky wet dough.
Remove from stand mixer and form into two separate disks. Wrap each disk in plastic wrap and place in refrigerator to chill for 30 minutes.
Once chilled, remove one disk from the refrigerator. Place dough on a hard surface that is covered with parchment paper. Cover dough with the plastic wrap (this makes it much easier to roll and keeps your rolling pin clean) and roll out into a rectangle slightly thinner than 1/8 inch. With a pizza cutter or pastry wheel, cut the dough into 1 inch squares. Using a skewer or other pointed kitchen tool (I used a meat thermometer) poke a hole through the middle of each square, ensuring you poke all the way through. Crimp the edges of each square with a fork, if you used a pizza cutter to cut the dough. If you use a pastry cutter or cookie cutter, this isn’t necessary. Sprinkle tops lightly with salt. Place cut crackers back into the refrigerator to chill for 20 to 30 minutes. Repeat with second disk of dough.
Preheat oven to 350 degrees. Cover a baking sheet with parchment paper.
Once chilled, remove dough squares from refrigerator and using a flat spatula, carefully transfer each square to the prepared baking sheet, spacing them approximately 1/2 inch apart.
Bake for approximately 11 to 14 minutes, until crackers are slightly puffed and a have begun to darken in color. If crackers aren’t crispy enough, simply pop them back in the oven for a couple more minutes, watching closely.
Remove from oven and place baking sheet on a cooling rack to cool completely. Store in an airtight container.
Notes: *Alternatively you can do the entire dough mixture in a stand mixer, or also do the entire mixture by hand instead of transferring to the stand mixer when you add the water, just takes some extra elbow grease.
*I think adding a little more cheese next time would be great, or play around with the flavor and use your favorite kind of cheese
*Also, instead of 4 tbsp. of butter, you could use 3 tbsp. butter & 1 tbsp. shortening





 Welcome! I'm Stephanie, a thirty something girl loving life with my husband Adam and our two little miracles living in gorgeous Southeast Tennessee. I'm passionate about Jesus, traveling, sports (Go Titans!), and of course food! Read more about me



I LOVE homemade cheez-its! Yours look great!!
Thank you Kayle!
These look so good. I thought they would be harder to make then that.
Thanks Michelle! I was surprised how easy they were to make as well!
these look super cute! i kinda like them puffy 🙂
Thanks Sarah! I like them puffy too;)
What a perfect snack.
Thank you Val!
I am adding this to my list of “summer vacation plans”…..I am pretty sure my kids will get a kick out of making these with me 🙂
Oh yay! Hope your kids enjoy them!:)
Yum, these look great – I love cheez its as well!
Thank you Laura!