I don’t know about you, but I’ve pinned tons and tons of ideas on Pinterest (you can follow me here). Most of which, I have never even attempted to make! So I set out this week to remedy that. Our house is slowly getting more decorated but I wanted to add a couple of things to give it more of a homey feel.
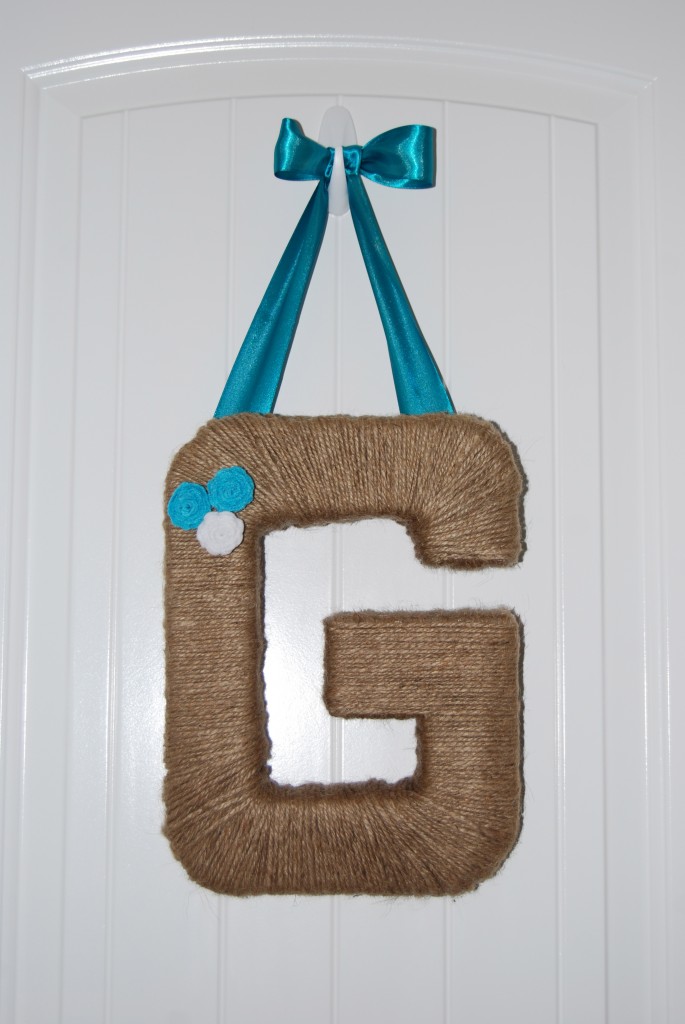
I actually saw a twine wrapped letter wreath on the front door of a friend of mine and went looking for it on Pinterest. I found it and used this how-to I found on Two Twenty-One. I absolutely love the way it turned out!! The only thing is while I was making this, I so wished I still had my initial from my maiden name which was a “T” and would have been MUCH easier than the “G” that had several curves which made it VERY tricky. It took me a while to make this because while wrapping the curves, I kept having to go back and unwrap and rewrap. And several times I would wrap, hot glue it in place and wrap again. Thank goodness for a hot glue gun!!! Below are a few pics of it in progress. I used the method for making petal flowers on Little Things Bring Smiles to make the felt flowers which was super easy. You just trace a cd and then draw your petals and cut, roll & hot glue!
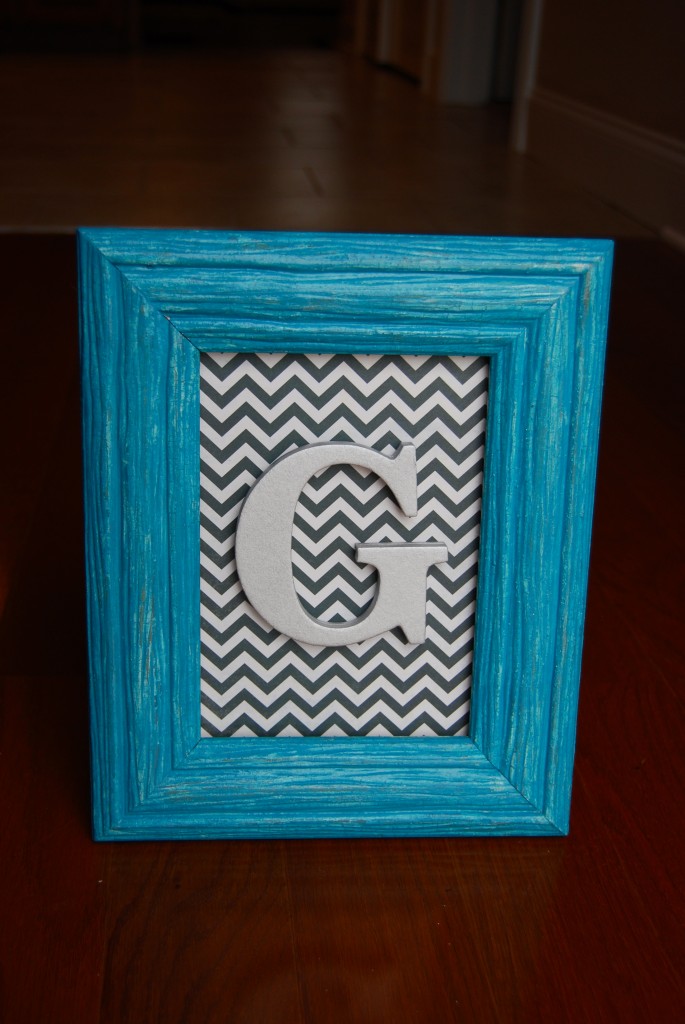
My next project was to jazz up a picture frame (idea from Bazea Blog) with some fun scrapbook paper and our last name initial. I found a cute white frame for 50 % off at Hobby Lobby and I bought some teal colored paint. I removed the glass from the frame and painted a thin layer of the blue paint and then lightly rubbed it with a paper towel while it was still wet to give it more of a rustic feel. I let that dry then I got some gloss interior varnish and painted that on to give it a shine. In hindsight, I would buy a paint that was already glossy or shimmery and save myself a step so I’ll do that if I make this again for a gift.
Then you cut your paper to size and glue the paper to the backing of the frame with a glue stick. Close the frame up. Spray paint a cardboard or wooden letter the color of your choice. Once the letter dries, hot glue the cardboard letter to the paper and pressed down so it adheres well, and then you are done!! It really didn’t take long at all, just the drying time for the paint, varnish and spray paint.
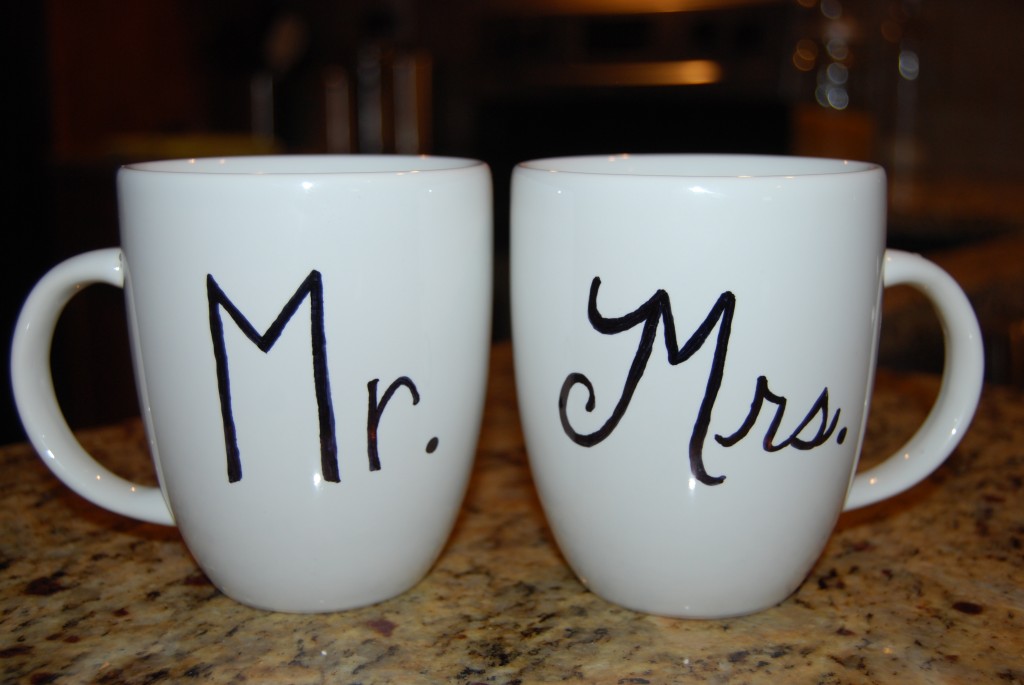
And finally, I have a wedding shower to go to tonight and wanted a cute and more personal gift to take. I found this idea from A Beautiful Mess to get white porcelain mugs (I got mine at Target) and draw designs on them with a sharpie and then bake at 350 degrees for 30 minutes.
I also found another blogger who had made these at Inspired By Beatrice Clay who gave a great tip. Before baking, while you are drawing your design, if you mess up just dab a cotton ball or Q Tip in nail polish remover and the sharpie comes right off.
I washed these with soap and water after I baked them and the design stayed in tact, but both of the above bloggers said not to put them in the dishwasher or your design will come off, so before baking I wrote “hand wash only” on the bottom of the mug with the sharpie to remind the bride & groom.







 Welcome! I'm Stephanie, a thirty something girl loving life with my husband Adam and our two little miracles living in gorgeous Southeast Tennessee. I'm passionate about Jesus, traveling, sports (Go Titans!), and of course food! Read more about me


How cute, love those mugs…a million possibilities just went through my mind. I too have a million pinned ideas, time to work on them.
Thanks Cathy! You could customize those mugs for any occasion I bet!
You go, girl!!!!! VERY, cute. Love your framed project! Absolutely love it. 🙂
Thanks so much Audra!
I love your letter!! It’s so cute!! I used the same tutorial to make my letter too! I’m not gonna lie, it took a whole lot longer than I thought it would to wrap it but I LOVE the look! I totally know what you mean about the curves – my “W” had a lot of angles which made it twice as hard (my friend made an “L” and finished in like half the time haha).
And can we talk about fabric flowers?! I went to probably 15 different blogs (plus a couple videos) to figure out how to make cute flowers…I couldnt get any of the techniques to work! So I ended up making up my own way of doing it and I was very happy with the outcome 🙂
And I saw those mugs on A Beautiful Mess too! That is the cutest idea to make them for a new couple! It would be fun to include some homemade hot chocolate mix & some homemade marshmallows – or some fun coffee!
I bet the W was tough with all those angles! That’s awesome you came up with your own way of doing the flowers too! Great idea for the mugs to include hot chocolate mix or coffee!
Love these projects!! Great job sista!!
Thanks Krystal!